Master Crispy Chickpeas: Oven & Air Fryer Crunch Secrets
There's a special joy in a truly satisfying crunch. For many, that joy comes from potato chips or pretzels, but what if we told you there's a wholesome, protein-packed alternative that delivers an equally addictive texture? Enter
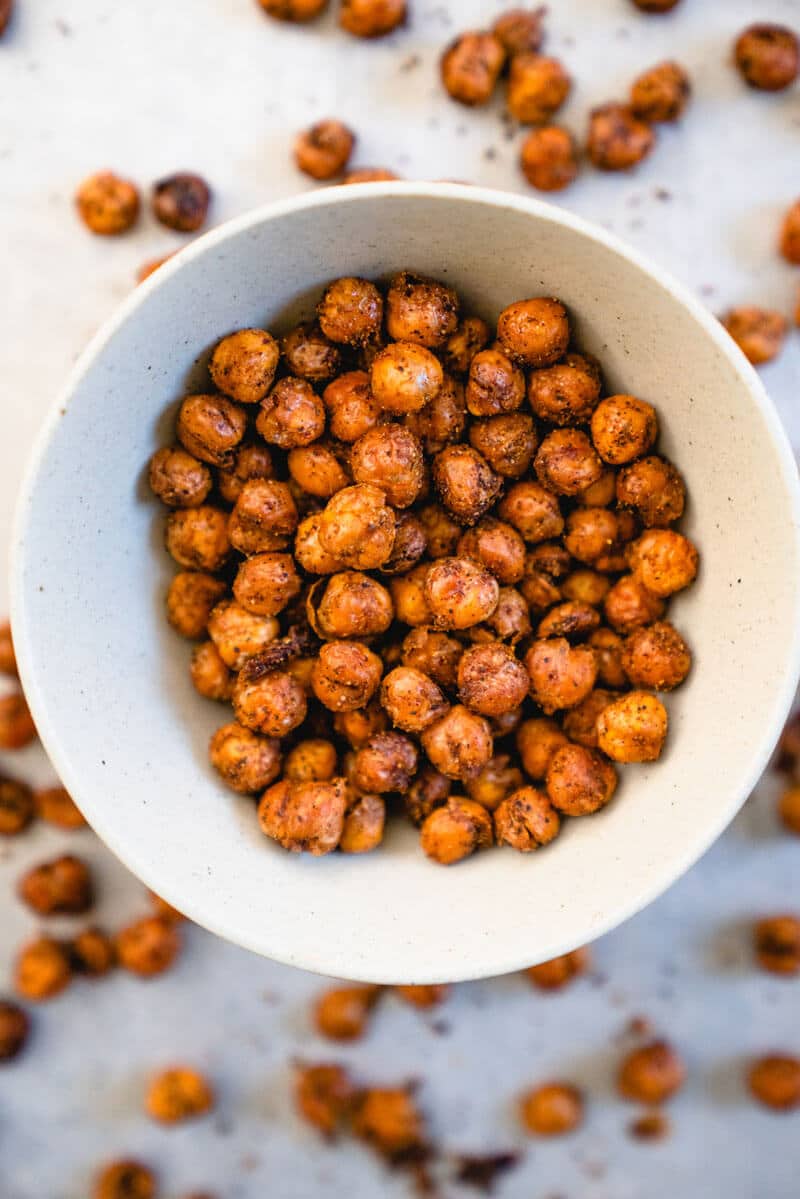
crispy chickpeas – a culinary marvel that transforms a humble canned legume into a gourmet snack or a versatile topping. Whether you're a seasoned chef or a kitchen novice, mastering the art of perfectly crunchy chickpeas is entirely within reach, and we're here to share all the secrets for both oven and air fryer methods.
From creamy hummus to hearty stews and vibrant Mediterranean salads, chickpeas prove their versatility time and again. But when roasted to a golden, spiced perfection, they elevate to a whole new level, offering a snack that's not only delicious but also incredibly satisfying. They're naturally gluten-free, rich in fiber and plant-based protein, making them an ideal choice for healthy snacking or boosting the nutritional profile of your favorite dishes. If you've ever found yourself with a can of chickpeas and a craving for something crunchy, get ready for a game-changer.
The Ultimate Crunch Code: Secrets to Truly Crispy Chickpeas
Achieving that coveted, shatteringly crisp texture isn't difficult, but it does require attention to a few key details. Many aspiring chickpea roasters fall short, ending up with chewy or even soggy results. The good news? Our tested methods tackle these common pitfalls head-on. The foundation of truly
crispy chickpeas lies in understanding and controlling moisture, proper seasoning, and precise cooking. For even more expert advice, make sure to read our detailed guide:
Unlock Ultimate Crunch: Essential Tips for Crispy Chickpeas.
Step 1: The Moisture Mission – Dry, Dry, Dry!
This is arguably the most critical step. Chickpeas straight from the can are packed with moisture, which, if not removed, will steam them rather than roast them, resulting in a soft, chewy texture.
*
Drain and Rinse Thoroughly: Start by draining your canned chickpeas (one or two cans work great!) and rinsing them under cold running water. This removes the aquafaba (the canning liquid) and any residual salt, ensuring a clean flavor.
*
Pat Them Bone Dry: This is where the magic happens. Spread the rinsed chickpeas in a single layer on a clean kitchen towel or several layers of paper towels. Place another towel on top and gently rub them, pressing firmly to absorb as much moisture as possible. Don't be shy – spend a few minutes on this step. The drier they are, the crispier they'll become. Some even recommend air-drying them for an hour or two after patting for maximum dryness.
Step 2: The Skin Game – To Peel or Not to Peel?
You might have heard whispers about removing chickpea skins. While not strictly mandatory, it’s a hack that can significantly contribute to a superior crunch. Chickpea skins can trap moisture and prevent even browning.
*
Easy Skin Removal Method: After drying, place the chickpeas between two towels and gently rub them together with your hands. You'll notice some skins loosening and peeling off. Don't feel pressured to remove every single one – even removing *some* makes a big difference. This process takes only a couple of minutes and is well worth the minimal effort for genuinely
crispy chickpeas.
Step 3: The Flavor Foundation – Oil & Spices
Once your chickpeas are dry and mostly skin-free, it's time to add flavor and a little bit of fat to help them crisp up and ensure the spices adhere beautifully.
*
Lightly Oil: Toss the chickpeas with just a tablespoon or two of a neutral high-heat oil like olive oil, avocado oil, or grapeseed oil. The oil helps conduct heat and promotes browning without making them greasy.
*
Spice It Up: This is where you can unleash your creativity! A classic blend for savory, perfectly crunchy chickpeas includes chili powder, ground cumin, and smoked paprika – a trio that delivers warmth and a subtle smokiness. But the possibilities are endless:
*
Classic Savory: Garlic powder, onion powder, salt, black pepper.
*
Spicy Kick: Cayenne pepper, red pepper flakes, a pinch of chipotle powder.
*
Herby Mediterranean: Dried oregano, basil, thyme, a touch of lemon zest.
*
Indian Inspired: Curry powder, turmeric, garam masala.
*
Cheesy (Nutritional Yeast): For a dairy-free cheesy flavor.
*
Sweet & Cinnamon: Cinnamon, a pinch of sugar, and maybe a drizzle of maple syrup after cooking for a sweet treat.
*
Taco Seasoning: For a Tex-Mex twist.
Toss everything together until the chickpeas are evenly coated.
Cooking Methods: Oven vs. Air Fryer for Crispy Chickpeas
Both the oven and air fryer can deliver fantastic results. Your choice will depend on the equipment you have and your desired cooking time.
Oven Method: The Traditional Roast
The oven offers a reliable way to achieve consistently
crispy chickpeas, especially if you're making a larger batch.
1.
Preheat Right: Preheat your oven to a moderate-high temperature, typically 400°F (200°C). This ensures immediate crisping upon contact with the hot air.
2.
Single Layer is Key: Spread your seasoned chickpeas in a single layer on a large baking sheet. Crucially, avoid overcrowding the pan. If the chickpeas are piled on top of each other, they'll steam instead of roast. Use two sheets if necessary.
3.
Bake and Stir: Bake for 30-60 minutes, stirring or shaking the pan every 15 minutes to ensure even cooking and browning.
4.
Watch Closely: The exact bake time will vary based on your oven's calibration and the chickpeas' initial moisture level. Start checking around 30 minutes. You're looking for a deep golden-brown color and a visibly crisp exterior. They should sound hollow when tapped. Be careful not to let them get *too* dark, as they can become hard and rock-like.
5.
Cool Down: Once perfectly crisp, remove them from the oven. For optimal crunch that lasts, let them cool completely on the baking sheet before storing or serving. This allows them to continue crisping as they come to room temperature.
Air Fryer Method: The Speedy Cruncher
The air fryer has become a favorite for many due to its ability to deliver incredibly
crispy chickpeas in a fraction of the time, often with a more uniform crunch.
1.
Preheat (Optional but Recommended): Preheat your air fryer to 375°F (190°C) for 3-5 minutes.
2.
Don't Overcrowd: Place your seasoned chickpeas in the air fryer basket in a single layer. You may need to work in batches, depending on the size of your air fryer. Overfilling the basket will lead to soggy results.
3.
Air Fry and Shake: Cook for 15-20 minutes, shaking the basket vigorously every 5 minutes. This ensures all sides get exposed to the circulating hot air.
4.
Check for Doneness: Like the oven method, look for a deep golden color and a crunchy texture. They cook faster in the air fryer, so keep a closer eye on them towards the end.
5.
Cool Completely: Transfer the crispy chickpeas to a plate or cooling rack and let them cool completely. This is vital for the final texture.
Beyond the Bowl: Creative Ways to Enjoy Your Crispy Chickpeas
Now that you've mastered the art of making perfectly crunchy chickpeas, the possibilities are endless! While they're an utterly addictive snack straight from the bowl, they also lend themselves beautifully to enhancing other dishes. They're a fantastic replacement for less nutritious snack options like potato chips or pretzels, offering satisfying flavor and texture without the guilt. If you’re looking to explore even more innovative ways to use this versatile legume, check out
Beyond Hummus: Your New Favorite Crunchy Chickpea Snack.
*
Snack Time Savior: Keep a batch on hand for a quick, healthy, and satisfying snack. Perfect for lunchboxes or an afternoon pick-me-up.
*
Salad Crouton Stand-in: Replace traditional bread croutons with crispy chickpeas for a gluten-free, protein-packed crunch on your Caesar, kale, or garden salads.
*
Grain Bowl Topper: Elevate any grain bowl (quinoa, farro, brown rice) by sprinkling crispy chickpeas over your veggies, protein, and dressings. They add fantastic texture and flavor.
*
Soup and Stew Garnish: A handful of spiced, crispy chickpeas adds a delightful textural contrast to creamy soups (like tomato or butternut squash) or hearty stews.
*
Trail Mix Upgrade: Combine them with nuts, seeds, and dried fruit for a custom trail mix that's both crunchy and nutritious.
*
Yogurt Parfait (Savory): For a unique twist, add savory crispy chickpeas to plain Greek yogurt with a drizzle of olive oil and herbs.
*
Curry or Wrap Enhancer: Sprinkle them over a vegetable curry just before serving, or add them to your favorite wraps for an extra layer of crunch.
Storing Your Crispy Chickpeas
To maintain their crunch, allow your
crispy chickpeas to cool completely before storing them in an airtight container at room temperature. They are best enjoyed within 3-4 days, though they often get eaten much faster! If they lose a bit of their crispness, you can refresh them by popping them back into the oven or air fryer for a few minutes.
Conclusion
Making perfectly
crispy chickpeas is a culinary triumph that's surprisingly simple to achieve once you know the core secrets. From diligent moisture removal and optional skin-peeling to choosing the right oil and spice blend, every step contributes to that ultimate, irresistible crunch. Whether you prefer the steady heat of the oven or the quick power of the air fryer, you now have the tools to transform ordinary chickpeas into an extraordinary snack or a versatile ingredient that will elevate countless dishes. So go ahead, grab a can, and prepare to embark on your crunchy chickpea journey – your taste buds will thank you!